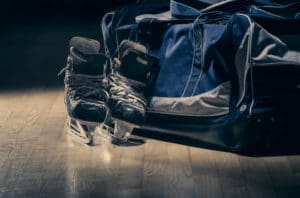
There it is again. Sitting, lifeless. Dropped off again right beside the washing machine. Its been there for three whole days. Left to fester, left to seep, left to marinade. The dreaded hockey bag, consequently full of sweaty equipment you’d rather forget about. It belongs to your roommate, your kids, your significant other, but honestly, it doesn’t matter who’s it is, you just want it to stop wafting through the entire house. So let Goldstar guide you. Here are four helpful hints to keep that hockey bag winners circle fresh.
1.Air it out; don’t let the wet gear sit.
First of all, don’t let it sit! The worst thing you can do is let the wet sweaty equipment sit. An indoor clothing rack will become your best friend. They’re easy to find and you can purchase at your local housewares stores. Somewhere like Fernie Home Building Center is sure to have what you need. Add a heater, a fan, or a dehumidifier to help speed up the process. On those bluebird days, lay it out on the deck. The cold temperatures will surely kill any smelly bacteria that may be lingering.
2.Wash what you can, regularly.
Aside from airing it out, it’s important to wash our hockey equipment to keep it fresh. A lot of hockey
equipment is safe to add right to the washing machine! Both front or top loading machines will do the trick. (make sure you leave enough room for equipment to move once it’s in the machine. A washing machine overfilled will lead to tears in equipment.)
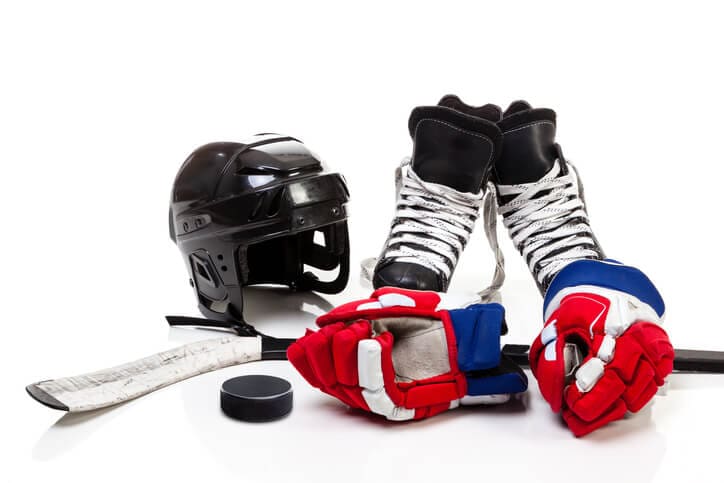
Here is a list of the hockey equipment you CAN and CANNOT wash in the machine.
WASHING MACHINE FRIENDLY
Socks, Jerseys, and base layers.
Jock (don’t forget to remove the cup as it cannot be washed in the machine. Fasten the Velcro so it doesn’t attach to anything else in the wash.)
Shin Pads*
Hockey Pants*
Elbow Pads*
Shoulder Pads* and
Gloves*
DO NOT use bleach; white vinegar CAN BE added to the wash is a great alternative, as it will kill odor-causing bacteria.
* DO NOT put equipment in the dryer. Allow it to air-dry.
NOT WASHING MACHINE FRIENDLY
Goalie Pads
Goalie Mitts
Skates
Helmet
If you’re not sure about any items, you can drop anything off at our dry cleaning depot and we’ll take care
of that for you.
3.Don’t forget the inside of the helmet.
In addition to our body equipment, an important piece of equipment that we never forget to play without, but sometimes we sometimes forget to wash, the helmet. To effectively clean the inside of your helmet you will need to follow these simple steps.
Mix a bowl with hot water and no tears kids shampoo.
Dip the sponge in water/shampoo mix, ring well, and scrub inside of the helmet.
Repeat process with only water and dry out.
(With sweat commonly built up in the helmet, it is especially important that you use no tears shampoo. If there is any chance that soap hasn’t been properly rinsed out and drips into your eyes while playing, this will save you from a tearful accident.)
4.LAST BUT NOT LEAST, Those smelly skates!
Finally, our most dreaded piece of equipment… the hockey skates. Though they may seem like the most daunting task, they are actually the easiest piece to clean. All you have to do is sprinkle some baking soda in those stinky blades, let them sit overnight and dump it out in the morning! You’ll be amazed by how effective this simple trick is.
“It’s the most wonderful time of the year…”
Staples Business Depot’s iconic 1996 commercial, featuring an exuberant dad back-to-school shopping with his not-so-enthusiastic kids, captures the feeling of relief felt by many parents at the end of summer.
However, the daily school routine comes with its own organizational challenges for both adults and children. So before you start singing from the rooftops, take some time to prepare a back-to-school plan that will make everyone happy to be hitting the books this fall.
Start a back-to-school routine
Routine is important for school-aged children. Two weeks before school starts, re-introduce kids to a typical school day schedule. Younger children in particular will benefit from earlier bedtimes, while teenagers should be gradually woken up closer to the hour they’ll need to rise when school begins. Make sure you leave enough time for things like breakfast, bathroom time and the trip to the bus stop.
As the week progresses, you can make adjustments to ensure everyone has plenty of time to get ready.
Create a centralized school calendar
Keeping track of parent-teacher meetings, band rehearsals and hockey practices can seem like an impossible task.
Take some of the stress out of after-school scheduling by creating a one-stop calendar for events and deadlines. The calendar should be prominent, easy to use and utilize a format that everyone is comfortable with. (A large dry-erase board or a 12-month paper calendar works serves as an excellent visual reminder for younger children, while older kids may benefit from email or text-based reminders).
Make the calendar part of your daily routine: Get in the habit of adding events to the calendar as soon as you hear about them (older children can help with posting duties). Talk to your kids about upcoming events so they won’t forget.
Organize your back-to-school shopping
Involve your kids in back-to-school shopping by having them help you prepare a shopping list before you hit the mall. This (hopefully) will prevent in-store arguments and tantrums.
Most schools will provide you with a list of required back-to-school supplies, which can serve as a starting point for back-to-school shopping.
With clothing, clear out some space in your kids’ wardrobe before going on a spending spree. Go through each item in your child’s closet, setting aside anything your child has outgrown (older children can help with this). Discard or donate anything your child will no longer wear.
Don’t go overboard buying stuff you think your child might need. Instead, wait until the first week of school to purchase any items you may have left off the list.
Gather your documents
Now is the time to start looking for vaccination records, birth certificates, doctors notes and other documents your child might require for school. Make photocopies of these documents before you send them off to school. Check your school’s website to make sure you have everything necessary to start the year off right!
It’s your home’s dirty little secret: much of the grime in your house comes from outside, trekked in on shoes that don’t appear to be either muddy or dirty.
Fortunately, a bit of smart planning can keep those messes from ever getting inside. We run down the top five ways to stop dirt at the door.
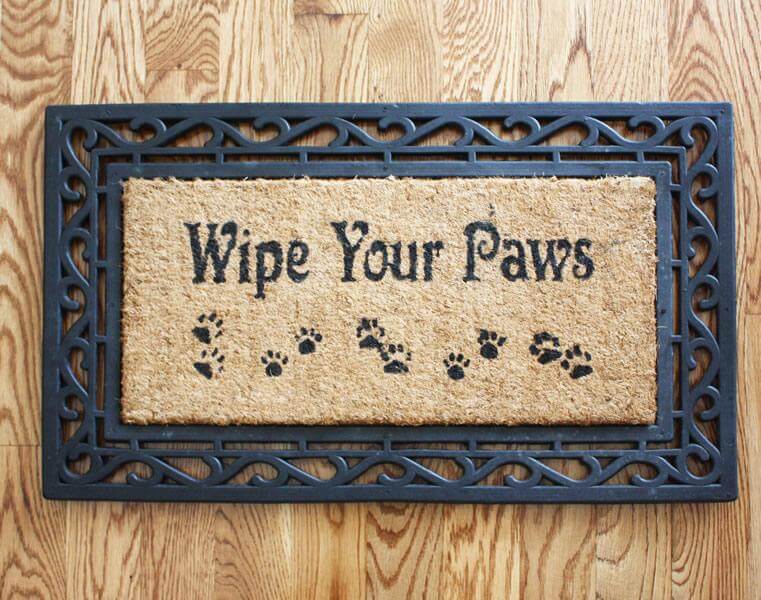
1. Choose the right doormats
Ideally, your house should have doormats at every entrance and exit. The mats should be as wide as the door’s width, and long enough to cover the length of a typical stride – that way, people will walk over the mats as they cross the threshold, depositing dirt into them as they go.
When selecting an outdoor mat, choose a durable material like rubber that can withstand the elements. If your area is prone to wet conditions, consider installing an outdoor wire rack to scrape off mud.
Indoor mats come in a variety of materials; look for mats that can be easily cleaned with a vacuum cleaner or shaken clean outside. Clean your mats at least once a week.
2. Keep pets from bringing their messes inside
Let’s face it: dogs and cats are less than diligent about wiping off their paws before coming inside, which is why you need to be ready to clean up after them. Keep a rag or towel handy near the door to wipe off dirt, water and mud. Brush your pet’s coat regularly to keep hair from accumulating indoors. Most importantly, do these things outside – there’s no sense unleashing tumbleweed-sized hairballs in your home.
3. Use floor mats indoors
Use indoor floor mats to catch dirt in high traffic areas like the fridge, the kitchen sink, the toilet and the bathtub. Be sure to choose non-slip mats to keep your dirt-catchers from becoming tripping hazards.
4. Prevent dirt from traveling through your house
Open doors and windows are an invitation for all kinds of particulate matter to occupy your home. Keep screens on windows and doors leading outside. Keep doors inside closed. You can also install door sweeps to keep dirt and debris from sneaking under entranceways.
5. Keep outdoor shoes outside
It can be tempting to hop outside in your loafers to grab the paper, but be sure to take off those shoes (or at least wipe off the soles) before you walk around the house. If your home doesn’t have a mud room, consider designating a garage, closet or shoe cubbie as the place to put outdoor footwear. If it was worn on your feet outside, it should stay outside.
You can be certain this kid’s outfit is going to have grass stains on it by the end of the day. (istockphoto.com)
If you enjoy spending time outdoors in the summer, you know that nature inevitably leaves its mark on your clothes in the form of unsightly, hard-to-clean grass stains.
You can blame chlorophyll, the chemical that gives plants their green hue, for ruining your favourite pair of jeans. In addition to being a strong dye, chlorophyll binds well with natural fibres, making it notoriously difficult to remove.
While delicate materials like silk or wool should always be handled by a professional dry cleaner, denim and cotton clothes can benefit from grass cleaning solutions you can make at home. The basic steps are similar in each case:
Note: Some cleaners can fade or discolour clothing. Always “spot test” cleaners on an inconspicuous location before applying it to the stain.
Step 1: Give the stain a hot water bath. Run the stain under hot water, preferably using a high-pressure nozzle. This will remove any solid grass pieces and loosen the stain. For best results, you should clean the stain as soon as possible to keep it from setting.
Step 2: Scrub the stain with detergent. Any liquid detergent will do. Use a scrub brush or a toothbrush and thoroughly scrub the affected area, then rinse.
Step 3. Apply a cleaning agent. There are literally dozens of products that claim to remove grass stains, but the simplest and most cost-effective home remedy is a mixture of baking soda and white vinegar. Sprinkle baking soda on the stain, then pour the vinegar over top and scrub the mixture while it fizzes.
Step 4: Launder in warm or hot water. Most denim clothing can handle your washer’s hot water cycle, while cotton clothes can be washed in warm water. Just in case, you should always follow the washing instructions on the label. Wash with detergent as normal.
If the stain persists after step 4, don’t put the clothing in the dryer – this will cause the stain to set. Instead, repeat steps 3 and 4 using “harsher” cleaners, starting with rubbing alcohol and then progressing to chlorine bleach. You can also try natural digestive enzymes, which are available at most health food stores. Mix the contents of several enzyme capsules in lukewarm water until you get a mixture with the consistency of toothpaste. Scrub the mixture into the stain and let it sit for 20 minutes, then repeat step 4.
For millions of dog and cat owners, Fido and Fluffy aren’t just pets – they’re part of the family.
But as much as we love our four-legged friends, they sure can make a mess of things: shedding fur, tracking mud and dirt into the house, and occasionally having an accident on that freshly-cleaned carpet. That’s why we’ve put together some simple tips to help make your pet clean-up easier and more effective.
Prevention
While it’s impossible to stop some pets from shedding, there are a few tricks you can use to keep pet hair from rolling freely across your home like tumbleweeds in a Western movie.
Brushing your cat or dog regularly will help to minimize shedding, which makes your job easier. You can also limit the areas where your pets travel, by keeping closet doors closed. This will greatly reduce the time you spend cleaning up after your pet.
Hairy Business
Regular vacuuming will help the minimize the spread of pet hair and pet odor. For best results, use a vacuum with HEPA filters and motorized brushes on your carpet. You can also use your vacuum hose to clean furniture and pet beds.
If pet smells have seeped into your carpet, sprinkle some baking soda on the carpet and let it sit for 20 to 30 minutes before vacuuming.
Don’t forget a pet owner’s best friend: the lint roller! Keep one of these handy to quickly clean up pet hair on clothes and furniture.
Oops, I did it again!
Speed is your friend when it comes to cleaning up after your pet’s accidents. Start by blotting the affected area with a dry towel (never scrub a wet stain; this will only push the stain deeper into the carpet). Keep changing towels and continue soaking up the stain until the area is dry.
For more stubborn stains, mix up a solution of equal parts water and white vinegar into a spray bottle. Spray the solution on the stain and let it sit for five minutes, then blot the area dry the area with some clean towels.
Finally, cover the area in baking soda and let it sit for a few minutes. The baking soda will soak up any leftover moisture, and will also help neutralize the smell. Vacuum up the baking soda once you’re done.
If you have hardwood flooring, linoleum or tile, cleaning up accidents can be a little easier. Just make sure to use an antibacterial product, which will help disinfect the area and neutralize potential odors.
Herbs like lavender and thyme are natural air fresheners for your home (istockphoto)
Spring cleaning isn’t just about getting rid of clutter and scrubbing floors. After a winter on lockdown, your home could probably use a good airing out.
Spring is a time of rebirth in the natural world, so why not take a page from Mother Nature’s playbook when combatting funky smells? These natural remedies will bring the fresh scent of spring to your home in no time flat.
-A chemical wunderkind, baking soda has near endless applications when it comes to combatting household odours. A scoop of baking soda poured down the drain with warm water will quickly neutralize smells coming from your sink or garbage disposal. To de-odorize carpets, sprinkle on a half a cup of baking soda for every square foot of carpet, wait fifteen minutes, then vacuum the carpet. Put baking soda in the fridge to remove food odours. It can be even be used on stinky sneakers!
-Tired of buying air fresheners that promise a “fresh” scent but actually smell like chemicals? Consider using herbs and spices instead. Natural lavender species come in a variety of smells which are less overpowering than pure lavender oil. To clear out a smelly kitchen, put some cinnamon sticks in a pot of water and bring to a boil on the stove. Hang bundles of fresh or dried thyme, rosemary, and mint throughout of your home for some natural aromatherapy.
-There’s also some solid research to suggest house plants can improve air quality in your home. Back in 1989, NASA tested a number of house plants as part of its clean air study, which researched ways to augment air filtration systems in space stations. Certain plants not only removed carbon dioxide and provide oxygen, they also removed harmful chemicals like benzene (found in petrochemicals) and trichloroethylene (used in industrial solvents) from the surrounding environment. Among the top performers were snake plant, pot mum, peace lily, Boston fern and English Ivy. For best results, the NASA study recommends using 15 to 18 good-sized houseplants in six- to eight-inch diameter containers in a 1,800-square-foot house.
–Coffee grinds can do more than help you stay awake – they can also soak up the stink from vomit, urine and other nasty accidents on clothes and upholstery. Place two or three layers of old dryer sheets over a stinky stain, then sprinkle coffee grinds over the sheets. The odour will be absorbed in the grinds overnight.
There’s no way around it – spring cleaning takes work. But if you’ve been following our 31-day Spring Clean Challenge, you know that the most effective way to tackle a big job is to turn it into several smaller jobs. Well, here are eight more time-saving tips to help you along.
Put together a cleaning caddy to keep your cleaning supplies close by (istockphoto)Make a cleaning caddy You can find these handy organizing buckets at most hardware stores. Fill the caddy with multipurpose cleaners, microfiber cloths and dish soap. That way, you’ll always have your basic cleaning tools on hand as you move about the house.
Find a place for everything Tackle large piles of clutter by subdividing the task into smaller pieces. Label a set of Rubbermaid containers with general areas in your home – kitchen, bathroom, laundry room, bedroom, office, garbage etc. Before you begin cleaning a room, place clutter into the appropriate box and place the box it in the room where the items belong. Once you’ve finished your cleaning for the day, sort through each box and find a home for your stuff. Repeat as necessary. (This is also a good way to sort through items when planning a garage sale.)
Move your furniture and appliances just enough to clean around them Unless you’re steam cleaning the carpets, there’s no need to clear a room of all furniture before you start. When vacuuming, simply move those big items a little to the left or to the right, vacuum the area previously occupied by the furniture and then move it back into place. As an additional task: check the pads on the feet of your chairs and couches, and replace any that are dirty to prevent scratching your floors.
A squeegee is your best friend when it comes to washing windows (istockphoto)Use all the tools in your cleaning armada Do you use the attachments that came your vacuum cleaner? You should. The upholstery brush attachment is perfect for cleaning cushions and drapes, while the crevice attachment can get into tight spots with ease. You can also use an extending rod to clean up high. And when cleaning windows outside, save time (and a small fortune in paper towels) by using a squeegee with a pole attachment.
Let water do your work Metal and plastic blinds can be removed from the window and cleaned outside. Scrub down the blinds with soapy water, then spray them clean with a garden hose. Lay the blinds flat on a towel to dry in the sun. Garbage cans, plastic furniture and toys can also be hosed down. Doing the work work outside will prevent you from accidentally bringing dirt and grime back in your house.
Make a lost and found box Don’t waste time fretting about where to put that orphaned sock or how to neatly arrange your collection of extra shirt buttons. Instead, set aside a container for items that have no obvious home. Then you can resume your cleaning duties and worry about the little details later.
Identify and eliminate clutter hotspots My personal hotspot is right next to the microwave on the kitchen counter. It’s a magnet for pieces of mail, flyers, old receipts and other documents I’m too lazy to sort. The trick to keeping such spaces clean is to remove the temptation; once you’ve cleared a hotspot, put something in its place – a lamp, a vase with some flowers or an art object – to block the clutter from re-appearing
Get rid of dust at the source A lot of the dust in your house gets recirculated by dirty air filters, vents and fan blades. Remove dust and dirt from ceiling fans and air-conditioner vents with a cloth and a vacuum with a soft nozzle attachment. Replace your air filters regularly, according to the manufacturer’s instructions.
One person’s trash is another person’s treasure. That pretty much explains the mysterious allure of the garage sale, an annual springtime ritual that also serves as a great excuse to de-clutter your home (and make some extra cash).
Of course, you’re not the only home on the block hoping to pawn off unwanted household items this spring. A successful garage sale requires organization, planning and a bit of luck. Here’s a step-by-step guide to making the most of your next junk sale.
1. Trash of treasure? Sorting through your junk can be emotionally difficult for those of us who get attached to their “stuff.” The best approach is to set firm rules for what you’ll keep and what you’ll sell. Some sellers use the year rule – if I haven’t worn it, read it, cooked with it, used it or looked at it in the past year, I’m selling it. Go through every room in your house, methodically sorting between items you absolutely need and items you can live without.
2. Clean up your merchandiseA little bit of polish can go a long way toward increasing the perceived value of that table lamp or toaster. Fix up all your items as best you can before displaying them. Clean plastic toys in a tub filled with hot, soapy water. Put fresh shoelaces on shoes and hang clothes on coat hangers. Test electronics. Throw out anything that is broken, damaged or that might present a danger to the buyer. Whenever possible, display items in their original boxes or containers, with instructions and spare parts included.
Fix up all your items as best you can before displaying them (istockphoto)3. Sort items by price and type Use colour-coded stickers to simplify the pricing process. Use intervals like 50 cents, $1, $2, $5, $10 and $20 to mark items (alternately, you can label entire boxes of goods with this approach). Mark items worth more than $20 with tags. When laying out your garage sale, sort items by where they might be used in the home; kitchen items go on one table, children’s toys and books in another.
4. Choose a date Host your garage sale when you have a full day to dedicate to the cause. Avoid long weekends and holidays when people might travel. A one-day sale is usually sufficient – shoppers know the best finds are usually gone by the second day. You may want to consider coordinating a group garage sale with your neighbours – the more people pass through your neighbourhood, the more likely people will stop to browse your selection.
5. Advertise at least two weeks in advance The most dedicated bargain hunters plan their trips well in advance, so you need to give them fair warning. Classified websites like Craigslist and Kijiji allow you to post advertisements for free. Consider posting an ad in the classified section of your local newspaper, setting up a Facebook event page, or emailing your friends and neighbours to tell them about the sale. In your ads, give customers some tantalizing glimpses of the great items they might find. (Some of the deals that tend to attract shoppers include wooden or antique furniture, sports equipment, appliances, artwork, antiques and vintage items, silverware and china.)
Use signs to guide shoppers to your doorstep (istockphoto)6. Be clear with instructions and directions Set firms hours for your garage sale to keep “early bird shoppers” from knocking on your door at the crack of dawn. On the day of the sale, post signs to direct cars to your home (Organized Home has some free printable direction signs). Make your signs BIG and bright so that drivers can see the address.
7. Be firm with hagglers – at first Don’t accept a low-ball bid on your best merchandise at the beginning of the sale. As the day progresses, it will be easy to see which items are selling and which are not. At that point, start offering better deals – a 50 per cent discount after 2 p.m., buy-one-get-one-free books, etc. Alternately, collect some of your hard-to-move items into “mystery bags” and sell them for a dollar apiece.
8.Ditch or donate anything you can’t sell if nobody else wants it, why keep it? Donate your leftover items to a local charity. If, for whatever reason, the item can’t be donated, dump it.
It’s spring cleaning season again. As you prepare to tackle some of the toughest cleaning jobs in your house, it’s worth taking a look at some of the things we do (or don’t do) that make the job more difficult than it has to be.
Here’s our list of the top 8 most common cleaning mistakes, in no particular order:
1. You spray and wipe in five seconds. The ingredients in most household cleaning agents take time to act, so if your cleaning regiment follows the five-second rule, it’s possible you’re not getting the full effect. Check the label for the “dwell time,” which will tell you how long to leave the cleaner.
2. You don’t use rubber gloves. You may have them, but how often do you actually use them? The chemicals in cleaners can irritate your skin or be absorbed into your body. Your best bet is to put on rubber gloves whenever you use chemical cleaners, and then wash your hands immediately afterward.
2. You don’t clean your dishwasher. You can’t clean dishes with a dirty dishwasher, and contrary to popular belief, simply running the dishwasher while it’s full won’t clean it. Every month or so, run your dishwasher empty on the hottest setting, with nothing but a shallow bowl of white vinegar on the top shelf. The vinegar will thoroughly disinfect your dishwasher’s innards.
3. You clean down low, but not up high. Ever wonder where all that dust comes from? Most likely, it starts up high in places you never clean – the ceiling fan, on top of the fridge, on the highest shelves of your bookcase – and gets scattered about the room. Take some extra time to clean those hard-to-reach spots, and you’ll be rewarded with less housework all-around.
4. You don’t throw out your sponges and dishcloths often enough. Rather than helping to wipe up messes, that old sponge or cleaning rag may actually be spreading germs and bacteria. If they get wet on regular basis, you should be replacing them every two weeks, tops.
5. You scrub spills out of your carpet. All you’re doing is pushing the stain deeper. Try blotting instead. For nasty spills, pour some soda water on the affected area first to draw out the stain.
6. You use paper towels for everything. They shouldn’t be used for every job. When cleaning glass, coffeepots and mirrors, consider using coffee filters, which won’t leave streaks or lint behind. To clean window shades, use an old dryer sheet – it will create a static layer that repels dust.
8. You don’t clean your pillows. Yes, pillows can be cleaned. In fact, they should be cleaned at least twice a year to prevent them from becoming breeding grounds for bacteria. Most down and synthetic fibre pillows can be machine-washed (check the label). Use a mild liquid detergent rather than a powder to avoid leaving behind residue, and run the rinse cycle twice to ensure a thorough clean. Dry the pillows on low heat, and throw in a couple of tennis balls wrapped in socks to re-fluff them.
If you’re anything like me, your cleaning regiment is probably very structured: clean the tops of things. Clean underneath those same things. Repeat as necessary.
But many homeowners neglect the most frequently-used items in their homes – their electronics, and in particular their computers. These ubiquitous (and expensive) devices can become clogged with dust and grime after years of continuous use, which can shorten their lifespan and expose you and your family to harmful bacteria (just think of how many people touch your keyboard in an average week.)
Fortunately, cleaning your PC is as easy as 1-2-3.
What you’ll need:
A Screwdriver
Can of compressed air (available from computer dealers or office-supply stores)
Cotton swabs (do not use a cotton ball)
Rubbing alcohol
Soft, lint-free cloths, paper towels, or anti-static cloths
Water
(Note: ALWAYS turn off electronic devices and unplug them before performing any cleaning or maintenance).
Step 1: Cleaning your tower
Computer towers require ventilation to avoid overheating. But the fan and vents also allow dust to get inside, which can make the ventilation systems less efficient.
To clean inside your tower, you must first open the case. Computers vary in the kinds of fastening mechanisms that hold the tower together – some use knobs or slots that can be removed by hand, while others are held together by screws. If in doubt, consult your computer’s owner’s manual. (Note, it some cases opening your computer case will void the warranty. If in doubt, consult your computer’s owner’s manual.)
Once the case is open, you’ll want to avoid touching the interior as much as possible. Remove large pieces of dust or lint with a cloth or a pair of tweezers. Angle the computer downward, then use the compressed air to remove dust from hard-to-reach corners. Use the compressed air to clean the tower vents, fan, disk drive and CD-ROM drive.
Finally, close the case, and wipe down the exterior of the tower with a cotton swab and some rubbing alcohol.
Step 2: Cleaning your monitor
Take care when choosing what materials to use when cleaning your monitor. Do not use paper towels, which can scratch the monitor surface – use a soft, lint-free cloth instead. Also, never spray cleaning materials directly onto a monitor screen – spray onto the cloth.
For LCD screens (used in flat screen and laptop monitors), wipe down the screen using a small amount of water on a soft, lint-free cloth. For glass screens (used in “TV-style” monitors), you can use glass cleaner, again with a soft, lint-free cloth.
Step 3: Cleaning your Mouse and Keyboard
Unplug the mouse and keyboard, if they’re connected to your computer, or turn them off, if they’re wireless.
To clean your keyboard, first turn it upside down over a sink or waste basket and shake out any loose debris. Then, use compressed air to clean between the keys. Finally, use a cotton swab and rubbing alcohol to wipe off any stains. In some cases, you may need to remove “sticky” keys and clean them separately.
To clean your mouse, use a cotton swab and rubbing alcohol to wipe off the top of the mouse. If your mouse uses an electronic sensor, rather than the traditional roller-ball, make sure to wipe off any dust or debris from the sensor. If your mouse has a roller ball, open the underside of the mouse and remove the roller ball. Soak the roller ball in water and let it air dry. Then, wipe the interior of the mouse with rubbing alcohol and a soft, lint-free cloth, then spray the interior with compressed air. Return the roller ball and to the mouse and close it.
We use cookies to ensure that we give you the best experience on our website. If you continue to use this site we will assume that you are happy with it.
 equipment is safe to add right to the washing machine! Both front or top loading machines will do the trick. (make sure you leave enough room for equipment to move once it’s in the machine. A washing machine overfilled will lead to tears in equipment.)
Here is a list of the hockey equipment you CAN and CANNOT wash in the machine.
WASHING MACHINE FRIENDLY
equipment is safe to add right to the washing machine! Both front or top loading machines will do the trick. (make sure you leave enough room for equipment to move once it’s in the machine. A washing machine overfilled will lead to tears in equipment.)
Here is a list of the hockey equipment you CAN and CANNOT wash in the machine.
WASHING MACHINE FRIENDLY