Shop

Cleaning tips for crafting with kids

Mom and Daughter Crafting
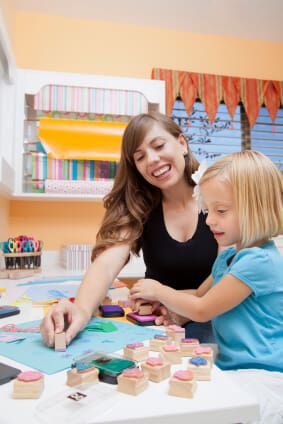
From paper mâché to play dough, crafting is a great bonding exercise for parents and children. Age-appropriate arts and crafts projects also give kids to the chance to unleash their creative energies in a constructive way.

As much as we love crafting, the clean-up afterward can definitely be a chore.  Fortunately, there are ways you can prepare your work space to make cleaning up easier and deal with any accidents that may occur.

Cover up!

Protect any areas that will get messy during craft time – this includes the workspace, any cleaning/drying stations and yourself.

Cover tables with a vinyl table cloth or shower curtain. These can be easily washed. (Avoid using newspapers, which can allow liquids and glue to soak through).  Wear a canvas apron to protect your clothing. For some crafts, it may be advisable to wear rubber or latex gloves.

Keep cleaning products handy

The best way to limit the spread of messes is to keep cleaning products close to your work surface.  For painting projects, keep a tub of water nearby, placing paint brushes, sponges, stencils, and other items in there as soon as you’re done using them.

Consider keeping a container of baby wipes or disinfectant towels near your craft area. These are handy for quick clean ups.

Be prepared for stains and spills

-Use a lint roller with disposable adhesive panels for all sorts of tiny objects, like glitter.

-To remove ink pen stains from clothing or walls, try using hair spray. You can also try blotting the area with rubbing alcohol.

-To remove glue stains on fabrics, wash article in warm, soapy water. To remove stuck-on glue from hard surfaces, try dabbing on a little vegetable oil, let sit for a few minutes and rub off gently.

-Acrylic or tempura paint stains should be cleaned while they’re still wet. To remove paint from clothes and carpets, dab the fabric with a damp cloth to soak up as much paint as possible. If the stain persists, dab with rubbing alcohol. For paint on walls and hard floors, wash the surface with warm, soapy water.

-For crayon stains on fabrics, try spraying a little bit of WD40 (a spray lubricant) onto the spot and dab clean with rag, then wash the area with liquid dishwashing soap and water.

Get the kids involved

Clean up is an important part of crafting, and kids should lend a hand. Assign your child chores appropriate to their age level, such as putting away supplies, cleaning the work station or throwing out any garbage. When all is said and down, don’t forget to display your child’s masterpiece somewhere everyone can see it!  

8 big cleaning mistakes you’re (probably) making

It’s spring cleaning season again. As you prepare to tackle some of the toughest cleaning jobs in your house, it’s worth taking a look at some of the things we do (or don’t do) that make the job more difficult than it has to be. Here’s our list of the top 8 most common cleaning mistakes, in no particular order: 1. You spray and wipe in five seconds. The ingredients in most household cleaning agents take time to act, so if your cleaning regiment follows the five-second rule, it’s possible you’re not getting the full effect. Check the label for the “dwell time,” which will tell you how long to leave the cleaner. 2. You don’t use rubber gloves. You may have them, but how often do you actually use them? The chemicals in cleaners can irritate your skin or be absorbed into your body. Your best bet is to put on rubber gloves whenever you use chemical cleaners, and then wash your hands immediately afterward. 2. You don’t clean your dishwasher. You can’t clean dishes with a dirty dishwasher, and contrary to popular belief, simply running the dishwasher while it’s full won’t clean it. Every month or so, run your dishwasher empty on the hottest setting, with nothing but a shallow bowl of white vinegar on the top shelf. The vinegar will thoroughly disinfect your dishwasher’s innards. 3. You clean down low, but not up high. Ever wonder where all that dust comes from? Most likely, it starts up high in places you never clean – the ceiling fan, on top of the fridge, on the highest shelves of your bookcase – and gets scattered about the room. Take some extra time to clean those hard-to-reach spots, and you’ll be rewarded with less housework all-around. 4. You don’t throw out your sponges and dishcloths often enough. Rather than helping to wipe up messes, that old sponge or cleaning rag may actually be spreading germs and bacteria. If they get wet on regular basis, you should be replacing them every two weeks, tops. 5. You scrub spills out of your carpet. All you’re doing is pushing the stain deeper. Try blotting instead. For nasty spills, pour some soda water on the affected area first to draw out the stain. 6. You use paper towels for everything. They shouldn’t be used for every job. When cleaning glass, coffeepots and mirrors, consider using coffee filters, which won’t leave streaks or lint behind. To clean window shades, use an old dryer sheet – it will create a static layer that repels dust. 8. You don’t clean your pillows. Yes, pillows can be cleaned. In fact, they should be cleaned at least twice a year to prevent them from becoming breeding grounds for bacteria. Most down and synthetic fibre pillows can be machine-washed (check the label). Use a mild liquid detergent rather than a powder to avoid leaving behind residue, and run the rinse cycle twice to ensure a thorough clean. Dry the pillows on low heat, and throw in a couple of tennis balls wrapped in socks to re-fluff them.

One step ahead: caring for your floors

Goodbye, snow and slush. Hello, water and muck. Your floors never get a break, no matter the season. Whether you’ve got hardwood, ceramic or vinyl underfoot, follow these tips to keep your floors properly maintained year-round. (Too busy to clean your floors? Goldstar Cleaning can help with all your floor-care needs.) Stripping and waxing
Your floor puts up with a lot, from dirt to pet hair. Make sure to return the favour by cleaning your floor regularly.
Floors with a wax finish should have the wax stripped and then reapplied at least once a year to maintain their shine and protect the floor from damage. There are different kinds of wax strippers for hardwood, vinyl and masonry (ceramic or stone) flooring; check with your local cleaning supply store to find the right kind for you. (Note: wax strippers are toxic and give off fumes. Be sure to use wax stripper in a well-ventilated area, and wear rubber gloves when handling.) To strip wax, apply a layer of stripper to a small area of floor, then wipe the area with a scrubbing pad to remove the waxy buildup. Use a scrub brush or a toothbrush to remove wax from corners and hard-to-reach areas. Use a putty knife to remove large wax deposits. Once the old wax has been removed, it’s time to apply a new layer. Apply the wax sparingly directly on the floor, and spread it into a very thin coat using long, straight strokes with a wax applicator or sponge mop. Open windows, and let dry to a shine. Apply two or three thin layers of fresh wax, being sure to allow each coat to dry thoroughly before applying the next. Buff your floor between wax applications to remove scratches and keep the surface looking radiant. Vacuuming, mopping and sweeping Regular vacuuming or sweeping will remove surface dirt from your floor. It also makes mopping and waxing less arduous. In addition to vacuuming, you should wipe your floor with a rag mop once a week to clear away surface stains. For vinyl, laminate and masonry floors, try a mixture of one part water, one part alcohol, one part vinegar and a few drops of dish washing liquid. Fill a spray bottle with the mixture spray, the floor, and mop. The alcohol sanitizes and helps dry the floor quickly, while the vinegar and dish washing liquid cuts through the dirt and grease with ease. Daily care for your floor Floors can be divided into two varieties: those that you can get wet, and those that you can’t. A wax finish does not make your hardwood floor water-proof. Wipe spills with damp paper towels as soon as they hit the floor, and buff the area with a soft, dry cloth. Avoid dragging furniture across your floor, which can scratch the surface. Attach felt or nylon glides to the legs of heavy furniture items, and check the glides occasionally for dirt, which can also scratch. Use area rugs or mats in high traffic areas like vestibules.

Home Renovations: 5 Great Rebate Programs

March 31, 2013 marks the end of the LiveSmart BC Efficiency Incentive Program, a tax rebate program for homes investing in energy-saving renovations. Since 2008, the wildly popular program has awarded over $77.5 million in incentives to 100,000 participating households. If you missed the deadline, never fear. There are plenty of other provincial and federal programs encouraging homeowners to invest in home renovations.. We round out our top five. (Certain restrictions may apply. Check websites for program details and deadlines.)   B.C. Seniors’ Home Renovation Tax Credit This year-old program assists individuals 65 and over with the cost of certain permanent home renovations to improve accessibility or help a senior be more functional or mobile at home. New Housing GST/HST Rebate: This federal program is meant to defray a portion of the GST or HST paid on a new house or substantially renovating an existing house, up to a maximum of 1.5 per cent of the GST/HST. Power Smart Incentives and Rebates BC Hydro’s program includes rebates for light fixtures, windows and home electronics. Switch ’n’ Shrink This Terasen Gas incentive gives homeowners a $1,000 rebate for switching to Energy Star natural gas heating systems. Other rebates and incentives are available for installation of an EnerChoice fireplace, and storage tank and furnace upgrades. Financial Assistance Canada Mortgage and Housing Corporation (CHMC) offers financial assistance to low-income homeowners, persons with a disability, homeowners in rural areas and seniors seeking home adaptations. (cmhc-schl.gc.ca)

5 iPhone apps to help you clean your home

A screenshot from “Chore Hero.”
You can do pretty much anything with your iPhone – everything, perhaps, except clean your house. Until Apple designs and iMaid, check out these five apps designed to make household chores more manageable.
Custom Hypnosis: House Cleaning Edition ($1.99) Using “specialized audio,” this app promises to turn time-consuming chores into hours of hypnosis-induced entertainment! HomeRoutines ($5) Like the gentle prodding of a parent, HomeRoutines helps you keep track of your cleaning goals. Create routine checklists, receive reminder notifications and create a “gold star” reward system for completing tasks. Clean Freak Cleaning Schedule ($.99) Designed by working parents, Clean Freak uses the “divide-and-conquer” approach to cleaning, breaking chores into 15 to 60 minute rotations. Green Shine ($1.99) Using a database of recipes based of household items, this app provides environmentally friendly solutions for more than 100 everyday housekeeping tasks, from simple window cleaning to stain removal. Chore Hero ($2.99) Is your family competitive? Chore Hero turns cleaning into a contest by allowing you to assign tasks to various members of your household. The app awards awarded points for each completed chore, with the winner being crowned the “Chore Hero.”

Citrus fresh: How to make natural household cleaner of out orange peels

Most people are well aware of the cleaning powers of vinegar. As an eco-friendly solvent and disinfectant, vinegar is cheap, versatile and a staple in most households. So, why don’t more people us it to clean their homes? If you’re anything like me, one of the major turn-offs of vinegar is its pungent odour. Luckily, there are ways around this smelly conundrum, with help from another natural source – orange peels. I say orange peels, but lemons, limes and grapefruits work equally well. That’s because the rinds of citrus fruits contain d-limonene, the compound responsible for that “citrus fresh” scent. D-limonene is a solvent and disinfectant in its own right, which is why it’s often used in commercial cleaners, air fresheners and soaps. So stop throwing out your orange peels, and instead follow this simple recipe to make your own vinegar-based citrus cleaner. What you’ll need: Orange or citrus fruit peels Distilled white vinegar Water A large, airtight glass container Strainer Spray bottle   Directions: -Fill an airtight glass container with citrus peels. -Fill the container with white vinegar so that the citrus peels are covered. -Seal the glass container and store it in a cool, dry place for two weeks, or until the vinegar takes on a strong citrus odor (the concoction should also change colour, depending on the fruit used). -Strain the liquid and pour into a spray bottle, adding water as desired to dilute the solution (a 1:1 ratio will reduce the pungent smell, while maintaining the cleaning power of the solvent.)

Good as new: How to clean jewelry naturally

For couples, Valentine’s Day is a time to celebrate the special love between two people. But for retailers, February 14 is a day for big consumer spending. The average Canadian household will spend $37 on Valentine’s Day gifts this year, according to The Retail Council of Canada. (Fun fact: Ontarians, are more likely to buy jewelry for their special someone than residents in any other province). So, if you’re lucky enough to get a bracelet, necklace or – gasp! – engagement ring for Valentine’s Day, follow these easy tips to keep your jewelry sparkling and new for years to come. Cleaning Silver -To remove tarnish from silver pieces without gemstones, try a soaking bath. Line a glass roasting pan with aluminum foil, dull side facing down. Put silver pieces on top of the aluminum foil. Pour about 1 litre of boiling water over the pieces and add 2 tbsp. of baking soda. Allow the silver to soak for five minutes, or until the water is cool enough to touch. Dry the silver with a clean polishing cloth. -If your silver piece contains gemstones, do not submerge it in water; water can rust or discolor your settings or cause the stones to become loose and fall out over time. Toothpaste, with its mild cleaning agents and gentle abrasives, is an effective single-ingredient cleaner for polishing tarnished silver. Apply the toothpaste to silver with a clean cloth. Avoid touching the gemstones. For intricate pieces, use a clean, soft-bristled toothbrush. Let the pieces air dry by placing them upside-down on a clean cloth. Cleaning Gold and Platinum -To clean gold or platinum jewelry that doesn’t have gemstones, use a mixture of soap and water. Fill a small bowl with warm water and add a few drops of mild dishwashing liquid. Submerge your gold jewelry in the mixture. Let the jewelry soak for 20 minutes, then rinse the jewelry thoroughly under running water. Dry the gold with a clean polishing cloth. -Never submerge gold or platinum jewelry with gemstones under water. Instead, dampen a clean cloth with the soap-and-water mixture mentioned above. Gently wipe down the piece, then use a cloth that has been dampened with water to clean off the soap. Let the pieces air dry by placing it upside-down on a clean cloth. Cleaning Copper -Pure copper jewelry (without gemstones) requires an mildly acidic solution to remove tarnish. Fill a small bowl with warm water and add a few drops of pure lemon juice and a teaspoon of salt. Submerge your copper jewelry in the mixture. Let the jewelry soak for 20 minutes, then rinse the jewelry thoroughly under running water. Dry the gold with a clean polishing cloth. -The same rule applies to copper jewelry as with gold and silver: do not submerge pieces containing precious stones in water. For these pieces, you can use ketchup (yes, ketchup!) to clean the piece. Add a small amount of ketchup to the copper with a clean cloth, or use a clean, soft-bristled toothbrush. Let the pieces air dry by placing them upside-down on a clean cloth.

Spruce up Your Spruce: Caring for your Christmas tree

A natural Christmas tree has a way of conjuring up memories of holidays past; the pungent smell of fresh pine needles, the sight of twinkling lights wrapped around the branches – not to mention all the colourful gifts waiting to be opened underneath – are all powerful reminders of the spirit of the holidays. Without proper care however, your majestic Christmas tree can quickly become a Charlie Brown-style twig or even a fire hazard. By following these six steps, you can avoid a cleaning headache on Boxing Day. 1. Choose your tree wisely. Not all Christmas trees are created equal. Fir trees, like the Douglas or Balsam Fir, and pine trees like the Scotch or White Pine hold their needles long after being cut down. Other varieties, like the Nordic or White Spruce, have poor needle retention and should only be bought and used as “living” Christmas trees (with the roots still attached). 2. Pick a healthy specimen. As a general rule of thumb, fresh-cut Christmas trees will last longer than pre-cut ones. Watch out for trees that have a large number of browning needles, or ones whose needles are rigid or fall off when brushed – they’re well on their way to becoming kindling. 3. Keep your tree hydrated. After bringing your tree home, cut about an inch off the trunk to allow water to flow into the stump. Keep your tree outside in a bucket of water for a few hours before mounting it indoors. You should purchase a Christmas tree stand that allows you to water your tree, and change the water at least once a day. 4. Cover your floor. Protect your floor from pine needle, debris and sap by choosing a tree skirt that is at least as wide as the tree, if not longer. For easy cleanup, place a plastic tarp on the ground under your tree skirt. When you’re ready to take your tree out to the curb, simply roll up the tarp and toss any fallen needles into the trash. 5. Remove any fire hazards. Keep your tree well away from fireplaces, space heaters, candles or other sources of heat; they’ll not only dry the tree out, they can also cause it to ignite. Check the cords of Christmas lights for exposed wiring and replace any bulbs that aren’t working. 6. Decorate with care. After mounting your tree, give it a day before decorating, to allow the branches to settle into their natural position. Add the heaviest decorations, like the lights, first, wraping them closest to the tree. Follow them up with draping decorations like tinsel, then the ornaments, and finally the star!

The 10-Minute Holiday Cleanup

‘Twas the night before Christmas, and all through the house, not a creature was stirring, not even a… dust bunny? With all the hustle and bustle of the holidays, keeping your space ready for Santa’s annual inspection can seem like a tall order. But not every cleaning job requires hours of work. This solid ten-minute cleanup will ensure your home is ready to entertain over the holidays. First, grab a laundry basket and gather up your clutter. This includes anything you don’t want guests to see. (We’re looking at you, Elf on the Shelf.) Focus on clearing out common areas, like the front entrance, kitchen, living and dining room and bathrooms. Throw in anything and everything that doesn’t belong, toss it in a closet and sort through it later. Next, wipe down surfaces, focusing on the bathroom and kitchen. Use quick disinfectant wipes to leave surfaces shiny and clean. If you’re pressed for time, don’t worry about moving things around. If you’re really pressed for time, cover the surfaces with holiday-themed decorations. (We’re looking at you, Elf on the Shelf.) Give the bathroom a once-over. Nothing fancy: pour some Pinesol into the toilet bowl, wipe down the mirrors, clean the sink and lay out fresh towels. Polish it off with some candy cane-scented pot pourri to give your WC a festive touch. Sweep, sweep, sweep. You want your floors to pass the “step test”: Can you walk across the floor in your stocking feet without picking anything up in them? Good enough. Finally, vacuum your carpets. Don’t concern yourself with the nooks and crannies; the key is to make those comforting “vacuuming lines” on the carpet, to show guests that you care about cleanliness – or at least pretend to.

The Five Scariest Cleaning Jobs in Your House

There’s nothing Hollywood loves more than a creepy “home-alone” horror movie, with potential danger lurking behind every corner. In real life, these often-neglected corners of your house could be hiding some very scary surprises. 1. Attic or crawlspace These storage spaces can attract real-life creepy crawlies, from pests to mold and mildew, which can damage your home and cause health problems if left unchecked. You should examine your attic or crawlspace every six months, looking for droppings, nesting materials or other signs of pests. If you find evidence of an infestation, call an exterminator immediately. You should also be on the lookout for dampness or foul odours, which can signal that water is getting in to the house. Be sure to wear a face mask when cleaning the space, especially if you have exposed insulation. If you’re using the attic or crawlspace to store items, be sure to put them in airtight plastic or rubber containers. 2. Under furniture Who knows what horrors lurk beneath the Chesterfield? Seriously, though, dust and pet hair accumulating under furniture can be a real nightmare for allergy sufferers. To clean under furniture on hardwood floors or linoleum, use an extension handle duster (the kind made for sweeping the tops of ceiling fans). Carpeted rooms require a bit more work. If you’re going to move the furniture out, consider giving the whole space a good steam cleaning – will keep you from having to perform this unpleasant chore again for some time. 3. The closet If I’ve learned anything from horror movies, it’s that closets usually contain one of three things: a monster, an axe murderer or clutter – and most people would rather deal with the first two. The key to organizing a closet is to divide and conquer. Take everything out of the closet and divide it into three categories: keep, dump or donate. Be ruthless; dump anything that’s damaged and donate anything you haven’t worn in a year or longer, doesn’t fit you or no longer suits your style. Once your closet is uncluttered, plan to keep it that way: install double rods and shelves to increase your storage capacity, store small items in containers and use the back of the door for a hanging shoe organizer. 4. The Fridge Scarier than the Blob, a dirty refrigerator is a potential breeding ground for bacteria and food-borne pathogens. And like the Blob, you should tackle this chore before it becomes too big to handle – about once a month. Clear your shelves, making sure to toss anything that’s spoiled or expired. If possible, remove the shelves and drawers from the fridge. Wipe down the shelves, drawers and the interior with a solution of two tablespoons of baking soda to one quart of hot water (avoid chemical cleaners, which can leave behind a scent that can be absorbed by the food.) You can place a tray of baking soda or cat litter in the fridge to eliminate lingering odours. Once a season, you should also unplug your fridge and vacuum the coils at the back of the fridge. 5. The Shower Psycho, anyone? You likely won’t meet a grisly end in the bathroom (as long as you have non-slip mats, of course). But it’s difficult to stay clean when your shower is dirtier than you are. Over time, your shower head can accumulate mineral deposits that will block the flow of water. To clean your shower head, immerse it in a pot of distilled white vinegar, then heat the pot on medium-low heat and rinse. Scrub down your shower walls with a mildew-busting solution of 1/2 cup vinegar, 1 cup ammonia, 1/4 baking soda and 3 litres of hot water. Wipe down glass shower doors clean with white vinegar for a crystal clear clean. Most shower curtains can be tossed in the washing machine; add half a load’s worth of detergent and 1/2 cup of baking soda during the wash cycle, then 1/2 cup of vinegar during the rinse cycle. Hang to dry.